Coursera courses can be integrated into Schoology using LTI 1.3 technology. Once a Coursera course(s) is enabled in the Schoology environment, users will be able to perform Single Sign-On (SSO) to Coursera course(s) right from the Schoology learning
Coursera courses can be integrated into Schoology using LTI 1.3 technology. Once a Coursera course(s) is enabled in the Schoology environment, users will be able to perform Single Sign-On (SSO) to Coursera course(s) right from the Schoology learning management system (LMS) and learning results will be synced from Coursera to Schoology.
LTI Setup for Granular Grade Sync Instructions
Attention: If you are interested in FINAL GRADE SYNC, please follow the instructions from the given article.
If you would like to proceed with the GRANULAR GRADE SYNC option, please follow the instructions given below.
When using granular grade syncing - specify how you would like a sync of learning results to Canvas LMS. SchoolDay supports two options for a granular grade sync:
Option A. LMS Instructor is responsible for creating Blackboard contents that are LTI deep-linked to the gradable item(s) that constitute a Coursera course. LMS gradebook will be populated with the entry for each deep-linked Blackboard content that corresponds to a gradable item of the Coursera course.
Option B. LMS Instructor will create a single Blackboard content that represents the entire Coursera course. SchoolDay will populate the LMS gradebook with entries for all gradable item(s) that constitute a given Coursera course.
The integration steps are the following:
- Configure Coursera course as an LTI tool;
- Publish Coursera courses in your LMS;
- Access Coursera courses from Schoology;
- Syncing learning results from Coursera to Blackboard.
The detailed instructions are given below.
Configuring Coursera as an LTI tool
- Login to Schoology as an Administrator.
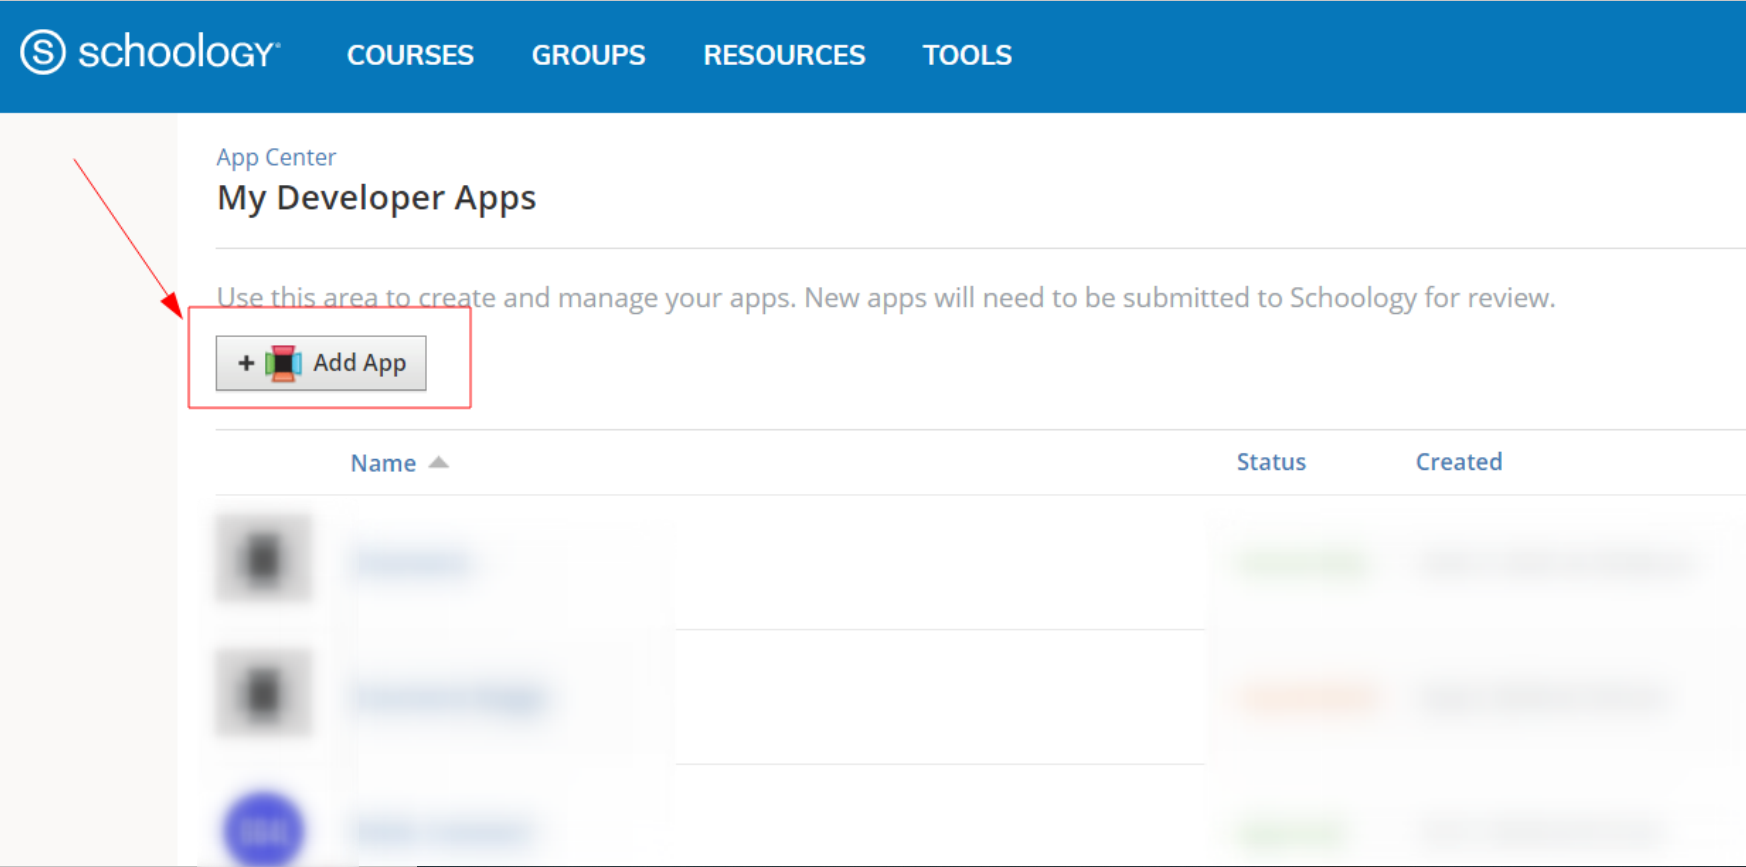
- Navigate to My Developer Apps in App Center, and click +Add App:
- Enter the following information in the External tool configuration section:
App Name: ex. Coursera
Description: optional
Category: choose the appropriate one
Available for: Only people in my school
Logo: optional, size 150x150
Type of App – Lti 1.3 App
Uncheck "Launch app in Schoology"
Can be installed for: Courses
Configuration Type: Manual
Privacy: Send Name and Email/Username of user who launches the tool
LTI Advantage Extensions:
check “Deep linking”
check “Assignment and Grade Services”
check "Names and Roles Services"
(These checkboxes can be enabled by contacting Schoology Client Success Managers or Support team for no charge).
JWKS URL: https://coursera.gg4l.com/ims/lti/.well-known/jwks.json
Domain/URL:if you want to use Option A for granular grade syncing if you want to use Option B for granular grade syncing https://api.gg4l.com/datahub/services/ims/lti/v1p3/line_items/deep_link https://api.gg4l.com/datahub/services/ims/lti/v1p3/deep_link
OIDC Login Init URL: https://coursera.gg4l.com/lti/tools/login_initiations
Redirect URLs:
if you want to use Option A for granular grade syncing if you want to use Option B for granular grade syncing https://coursera.gg4l.com/auth/lti13/SSO
https://api.gg4l.com/datahub/services/ims/lti/v1p3/line_items/deep_link
https://coursera.gg4l.com/auth/lti13/SSO
https://api.gg4l.com/datahub/services/ims/lti/v1p3/deep_link
Check “This application meets the Schoology Terms of Use”
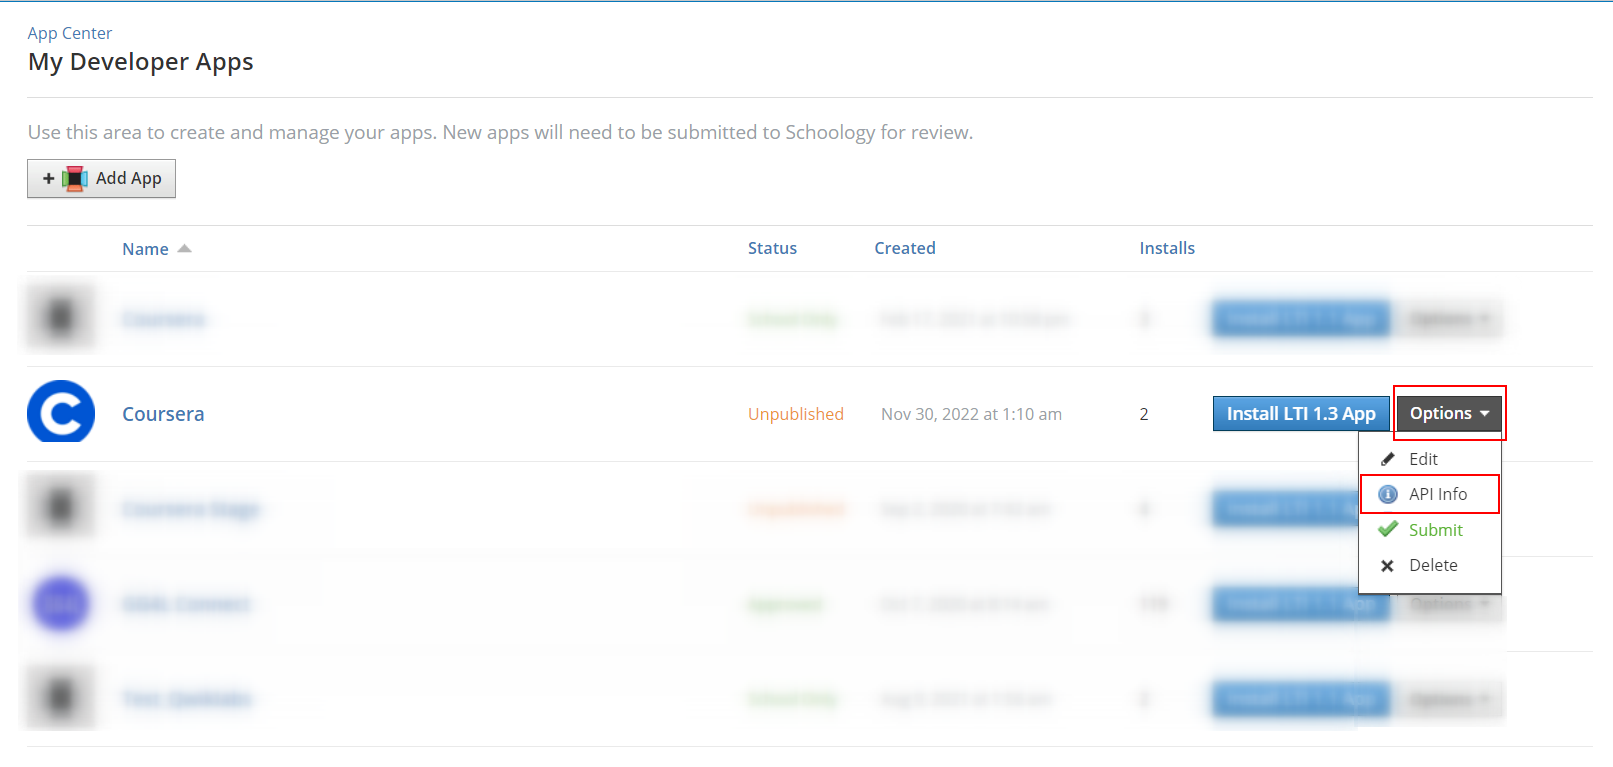
Click Submit to save the application. - Find the created Coursera Application in My Developer Apps, click API info and copy Client ID:

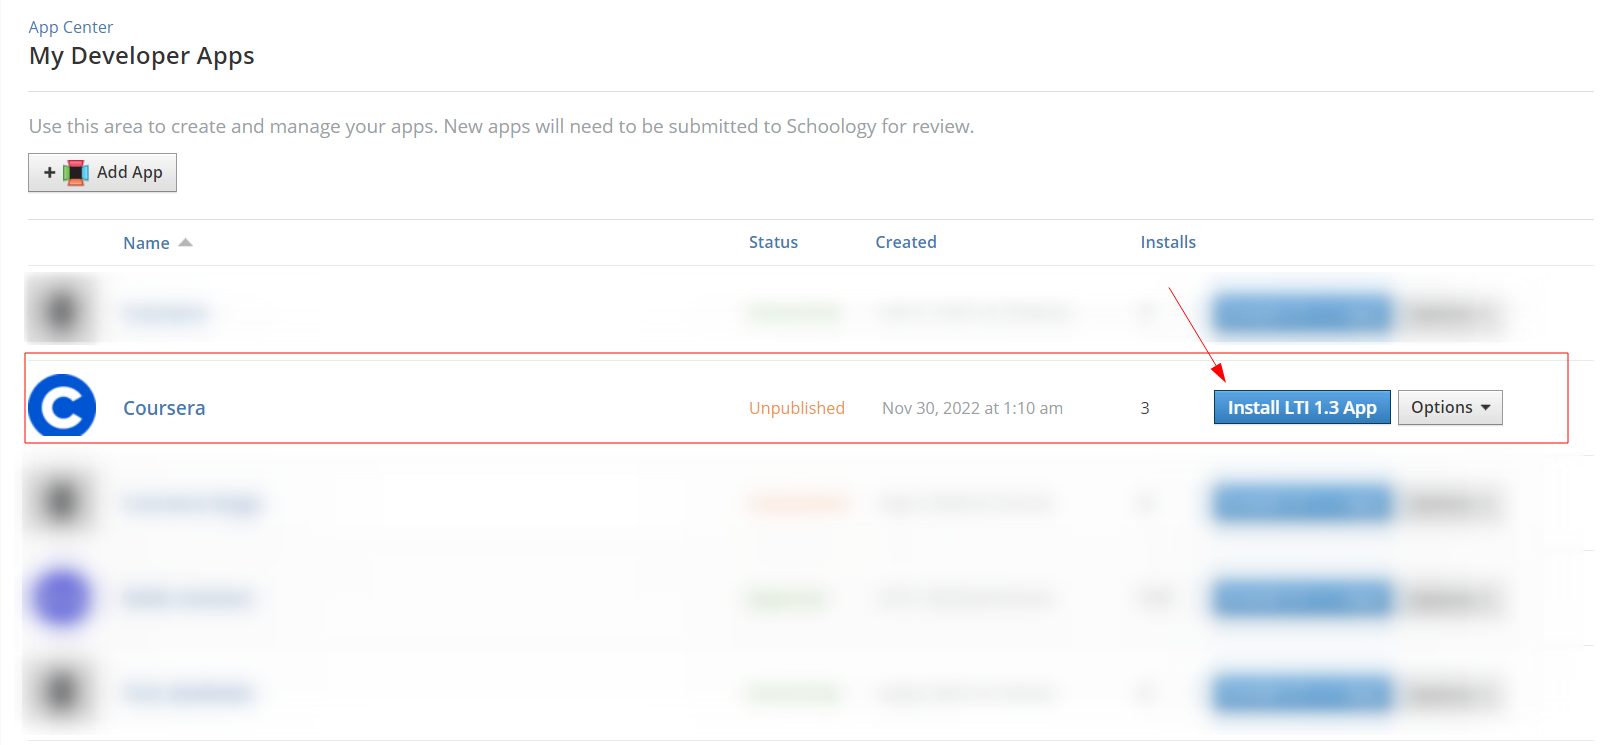
- Find the created Coursera Application in the list of your Developer Apps, and click Install LTI 1.3 App:
- Click “I Agree” and “Continue” in the “Install LTI 1.3 App” modal windows, then “Add to organization”:


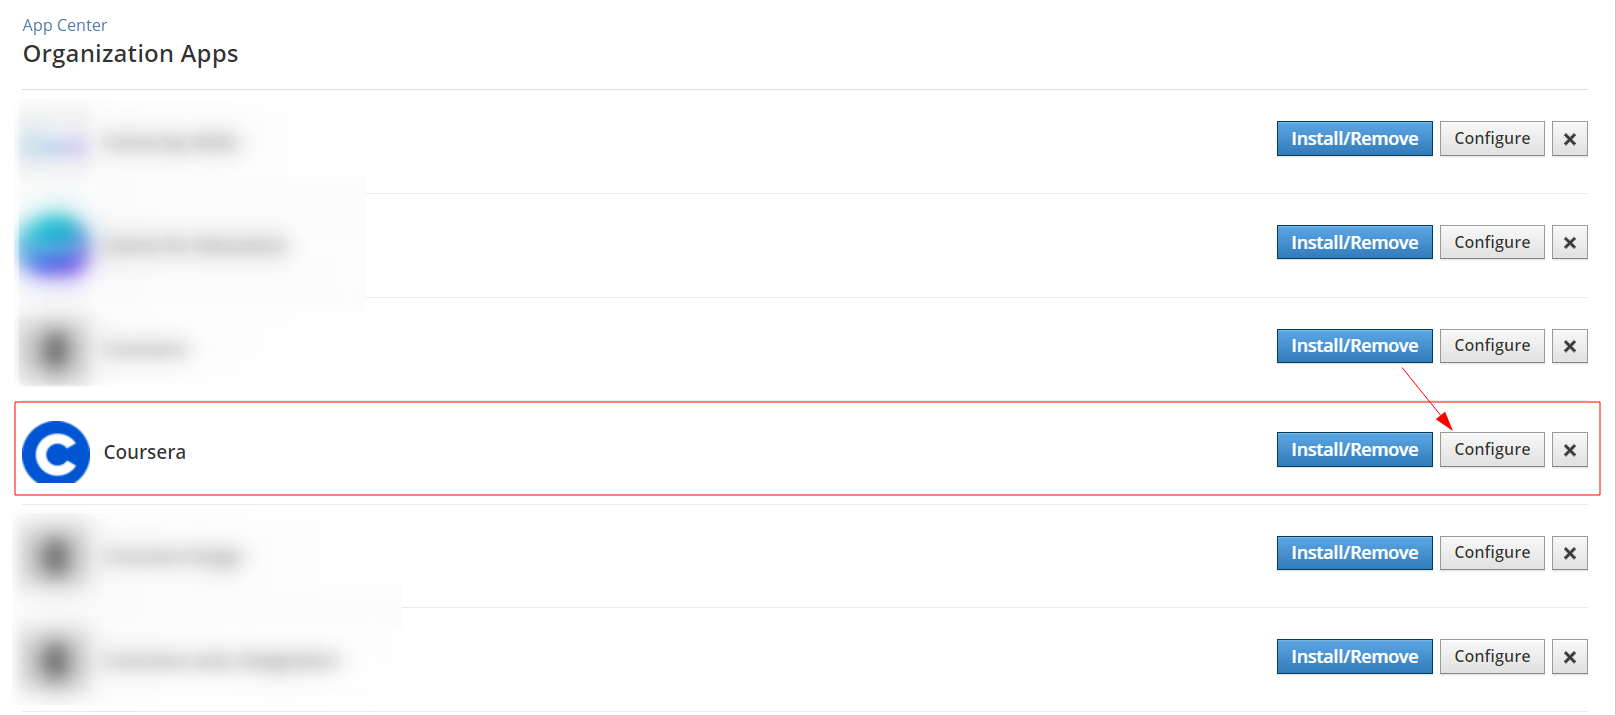
- Find the application in the list of Organisation Apps and click “Configure”:
- Copy the Deployment ID, share the copied value and previously copied Client ID with the SchoolDay Customer Support (support@gg4l.com) via email, and click “Save Settings”:

- Go back to the “Organization Apps” view, click “Instal/Remove”, check the checkbox “All Courses” and hit “Submit”:

- A pop-up window will inform you about successful App activation:

11. Before moving on to the next step, Publishing Coursera courses in your LMS, please send the following values to SchoolDay Customer Support (support@gg4l.com) via email:
Authentication request URL: https://lti-service.svc.schoology.com/lti-service/authorize-redirect
Public keyset URL: https://lti-service.svc.schoology.com/lti-service/.well-known/jwks
Access token URL: https://lti-service.svc.schoology.com/lti-service/access-token
Client ID: from Step 4
Issuer: https://schoology.schoology.com
Deployment ID: from Step 8
Publishing Coursera courses in your LMS
This section describes publishing Coursera Course(s) into a Schoology course.
- On the Course view page, click “Add Materials” in the Materials tab, and choose the Coursera application that was created in the previous steps.

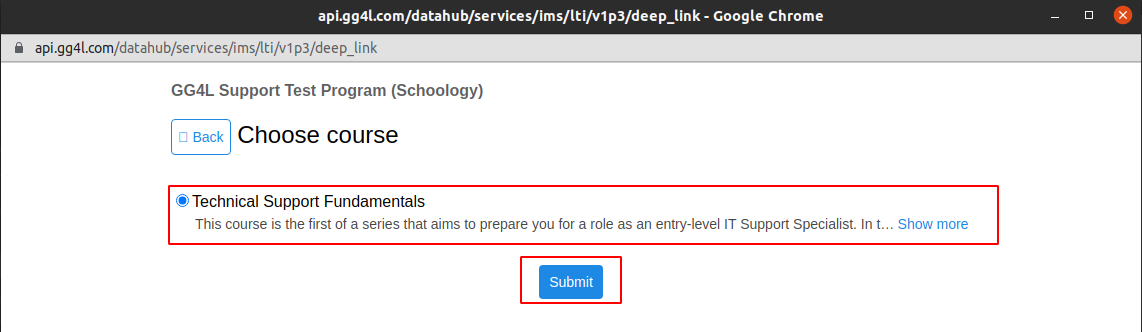
- A new window with the content will open. On the top, there is the name of the Learning Program. Please, choose the course you need to publish and click “Submit”:
When Option A is selected.
For creating content that is LTI deep-linked to the gradable item(s) that constitute a Coursera course - choose the Coursera learning program, then the Coursera course then choose the line item and click the SUBMIT button.


When Option B is selected.
For creating a single content that represents the entire Coursera course - choose the Coursera learning program, then the Coursera Course and click the SUBMIT button.
- The links are now published in the Materials section:
When Option A is selected.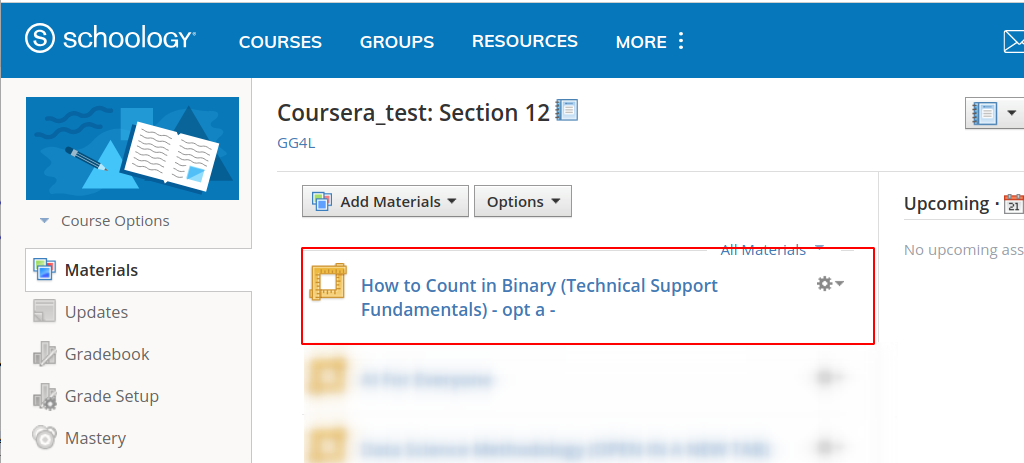
When Option B is selected.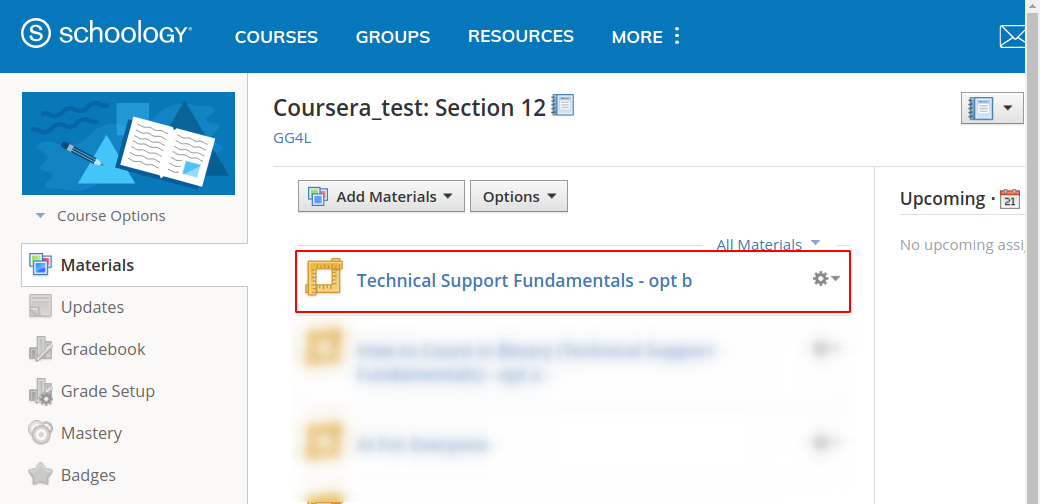
Please note: the Material will be present in the Gradebook only after a Category is assigned to the published Material. It can be done by clicking the Gear icon -> edit -> choosing a Category.
Accessing Coursera Course from Schoology
- To access the Coursera course, the LMS learner should navigate to the corresponding Schoology course and click the link to the Coursera course in the Materials view:

Please note: we recommend opening the link in a new tab, so that the user can go back to their Schoology page if needed.
2. Once the user is redirected to Coursera for the first time, the user is prompted to complete enrollment: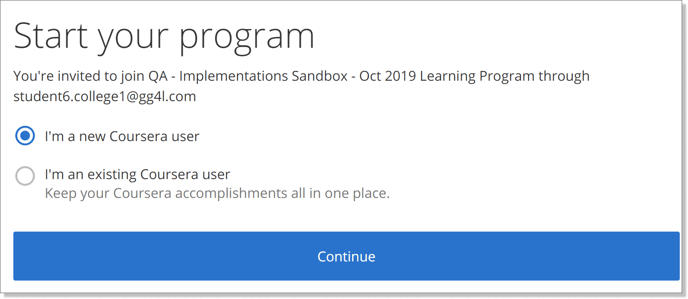
There are 2 scenarios at this stage:
a. The user already has a Coursera account: the system will ask the user to provide an email address and a password for the existing account: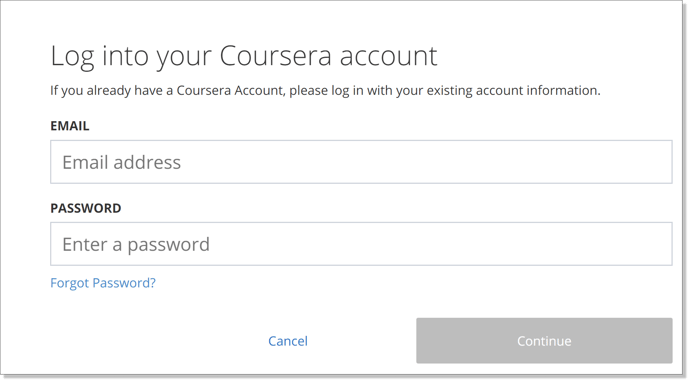
b. The user is new to Coursera: the system will prompt the user to create a password: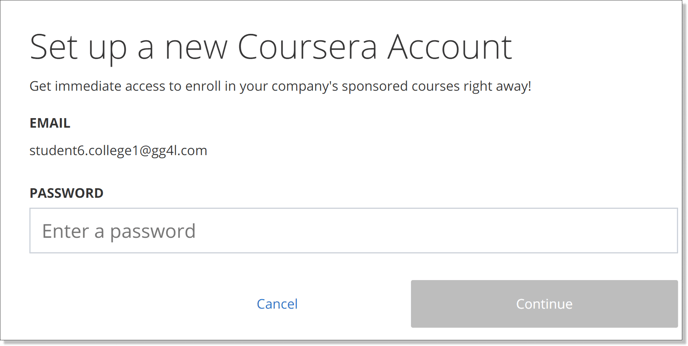
3. Once the user establishes an association with the Coursera program, they will be navigated to a respective Coursera course page and need to click "Enroll":
Syncing learning results from Coursera to Blackboard
To examine the learning results from Coursera for learners, who are enrolled in the course, LMS Instructor navigates to the Gradebook of the course: 
The Coursera redirect links are published as assignments, and as a result - a new column for the course grade is automatically created in the grade book as soon as there is the first grade.
The grades appear in the grade book within 24-72 hours after the student completes the course and receives the final grade.
For Granular Option B: Expect the line items (gradable items) columns to be published soon after the SSO link to a Coursera course is accessed. The new columns will be available in the grade book under the "Ungraded" Category.
1 . To make the created columns available for grade passback, in the Gradebook navigate to Bulk Edit: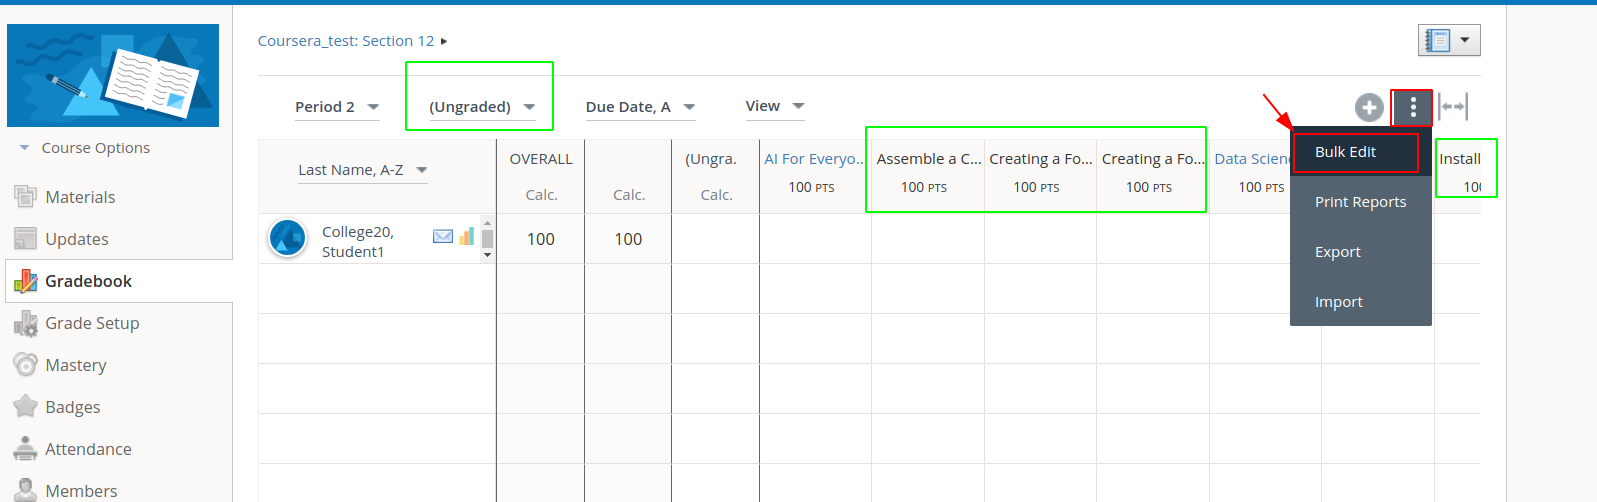
2. Change the Category:
