.svg)
Learn how to automate file transfers to an SFTP server using the WinSCP tool and Task Scheduler.
In this article
Generate a file transfer code in WinSCP with the SFTP credentials
Download the batch file template
WinSCP is an open source free SFTP client, FTP client, WebDAV client, S3 client and SCP client for Windows. Its primary function is file transfer between a local and a remote computer. Beyond this, WinSCP offers scripting and basic file manager functionality.
After creating an SFTP Import, you can use the features of WinSCP along with Windows Task Scheduler to automatically sync your CSV files with School Passport.
Prerequisites
- A separate email with the link to set up a password for your GG4L Connect account should be sent to you. Activate your admin account in GG4L School Passport according to instructions from the email. Please note, that the link for account setup is valid only for 24 hours. If the link has expired, please contact support@gg4l.com and request a new one.
- Download WinSCP from the official site and install it according to the producer's requirements.
Get the SFTP credentials from School Passport
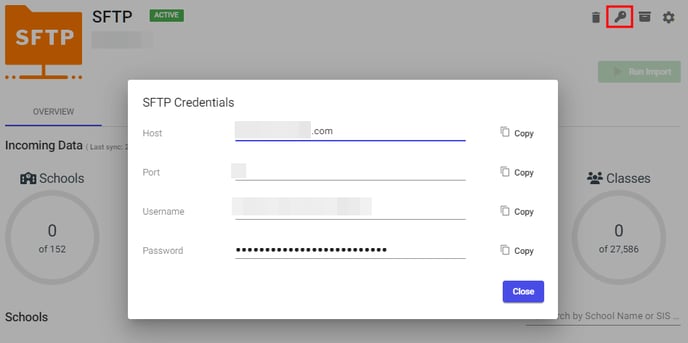
To obtain the remote SFTP server credentials to transfer the CSV files, do the following:
- Navigate to the required SFTP Import
- Click SFTP Credentials on the top right.
- Click Copy and save SFTP Credentials (Host, Port, Username, and Password) to any text file.
Generate a file transfer code in WinSCP with the SFTP credentials
-
On the desktop or in the Windows Start Menu, run WinSCP.
-
On the Login Dialog window enter saved credentials and click Login:

- (Optional) If you connect for the first time, an SSH server requires verification of the host key. On the warning that appears, click Yes.

Note:If you don`t want to enter session data every time you connect, store them on the site. To save your current session, click the Session on the top menu and select Save Session as Site. If you would like to learn more, you can see Saving Opened Session.

- In the Session menu, click Generate Session URL/Code.

- In the Generate Session URL/Code window, go to the Script tab, and select Batch file.
- Copy the selected rows to any text editor:

- Row #1 ("C:\Users\..\WinSCP\WinSCP.com" ): Path to the WinSCP setup file.
- Row #2 ("open sftp://.."): Your credentials.
Download the batch file template
Download the BAT file and save it in the directory with read/write permission.
Alternatively, you can simply copy the batch file template provided below in any text editor.
@echo of

:: The path to the WinSCP setup file.
"C:\Program Files (x86)\WinSCP\WinSCP.com" ^
  /log="%cd%\WinSCP_log.log" /ini=nul ^
  /command ^

    :: User's credentials.
      "open sftp://lena_test_user:ey%%5EP8otmegeen9C6@upload.gg4l.com:22/ -hostkey=""ssh-rsa 2048 G+O9aTEBtroP3affHp6sj0v3qocrMRUaeRPnpZi6T1w""" ^
    "cd /" ^

    :: Path to the local folder with .csv or .zip files.
    "lcd D:\sftp\files\" ^
    "put *.*" ^
"exit"
Modify the template batch file with the file transfer code
- Open local_files_to_sftp.bat in any text editor. For example, below it is opened in Notepad++. You need to edit the following rows:

- Row #1 ("C:\Program Files (x86)\WinSCP\WinSCP.com" ^): Contains the path to the WinSCP setup file.
- Row #2 ("open sftp://..): Contains the user's credentials.
- Row #3 ("lcd D:\sftp\files\" ^): Contains the path to the local folder with .csv or .zip files.
- Replace rows #1 and #2 with the data saved from WinCSP.
.png?width=688&height=228&name=Group%207%20(1).png)
- In row #3, specify the directory path where your CSV files or an archive containing them are located. For example, D:\sftp\files\.
- Save the modified batch file in the directory with read/write permission.
Schedule file transfers to the SFTP server
You can activate the script automation (the script will run automatically at the scheduled time) with Windows scheduling capability. To add a new scheduled taskЖ
- Open Task Scheduler:
- Windows 11: Go to Windows Start menu > All apps > Windows Tools > Task Scheduler. Or in a search box, enter Task Scheduler.
- Windows 10: Go to Windows Start menu > Windows Administrative Tools > Task Scheduler. Or in a search box, enter Task Scheduler.
- Windows 8.1: Right-click Windows Start menu> Control Panel > System and Security > Administrative Tools > Schedule Tasks.
- Windows 7: Go to Windows Start menu > Control Panel > System and Security > Administrative Tools > Schedule Tasks.


- In the Task Scheduler menu, go to Action panel > Create Basic Task.

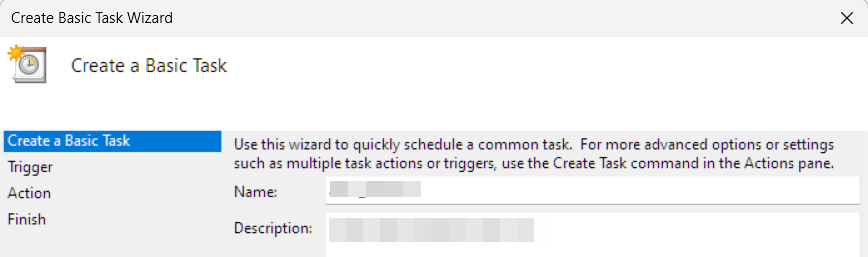
- In the Create a Basic Task Wizard, enter your task name and then click Next.
- Choose when the task should be run and click Next.


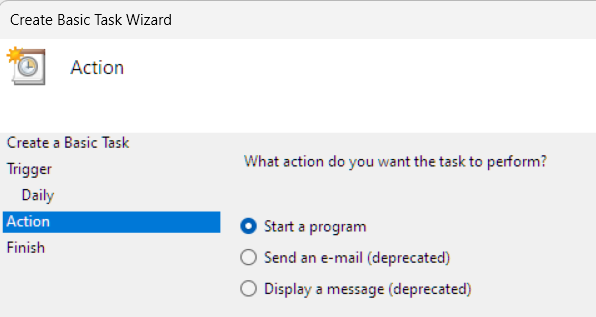
- Go to the Action tab, choose Start a program, and then click Next.
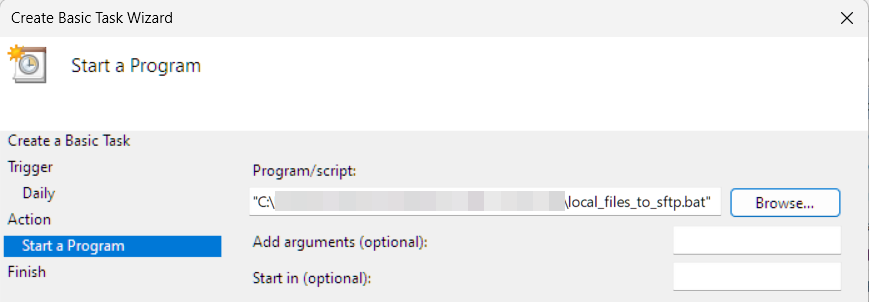
- Browse for "local_files_to_sftp.bat" in the folder that you specified in the modified batch file. Then, click Next.
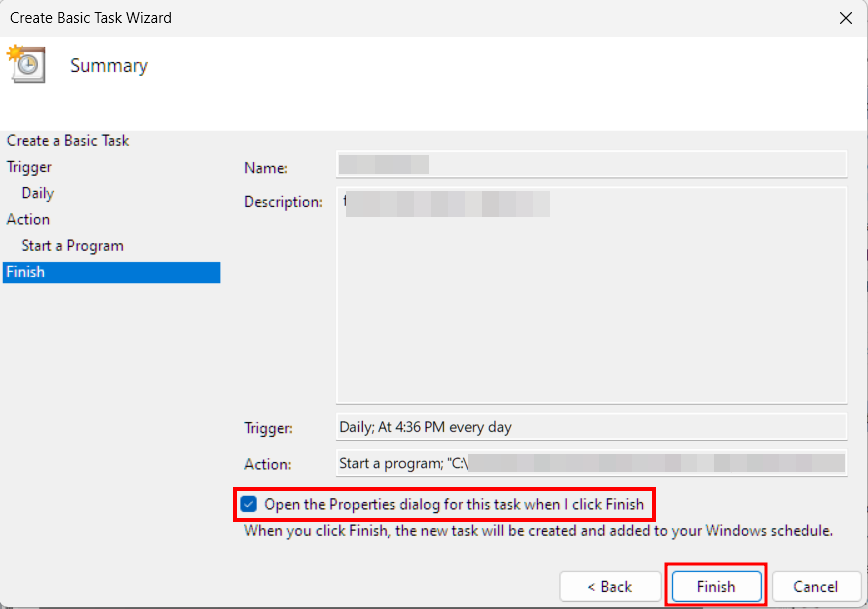
- Select the checkbox and click Finish.
- On the following window:

- Choose the user with administrative rights and a non-empty password.
- Select Run whether user is logged in or not.
- Select Run with highest privileges.
- Enter the password and click OK.
