Product: SP Connect, AppStore Module
Privileges: Primary Admin privileges
SchoolDay Single Sign-On (SSO) provides users with the ability to securely log in to connected applications via SchoolDay Portal. This means that users log in to SchoolDay just once with one set of credentials, or use a SchoolDay QR Code (Badge), and then click on the various app icons to be logged in automatically via SSO. Instead of having to remember separate sets of credentials for each application or service, users can simply log in once and access their full suite of applications.
SSO works based upon a trust relationship set up between an application, known as the service provider (SchoolDay), and an identity provider (e.g. ADFS, Active Directory, Google, etc.) This trust relationship is often based upon a certificate that is exchanged between the identity provider and the service provider.
SchoolDay SSO service uses SAML protocols. SAML is an extensible markup language (XML) standard that facilitates the exchange of user authentication and data authorization across secure domains. SAML-based SSO services involve communications among the user, an identity provider that maintains the user directory, and a service provider.
SSO authentication workflow:
- A user logs in to SchoolDay via the district's Identity Provider (IDP) (e.g. ADFS, Active Directory, Google, etc.) from the SchoolDay login page;
- SchoolDay authenticates the user through the district's IDP;
- If the user is verified, SchoolDay creates a "token" that identifies the user and then logs them in successfully;
- The user then clicks on the appropriate application icon to open an application, and SchoolDay provides the user's token to the application which authenticates the user. Because of this user does not need to enter login credentials a second time.
- The user is logged into the App.
Note: Adding SSO application requires login method (Identity Provider -IDP) configured.
To add and assign the SSO app, please follow the instructions below:
- Log in to your SchoolDay profile, and navigate to Connect (Data-Sync) module;
- Go to the Application Gallery section, and find the application you would like to use. Once identified, click ACTIVATE;
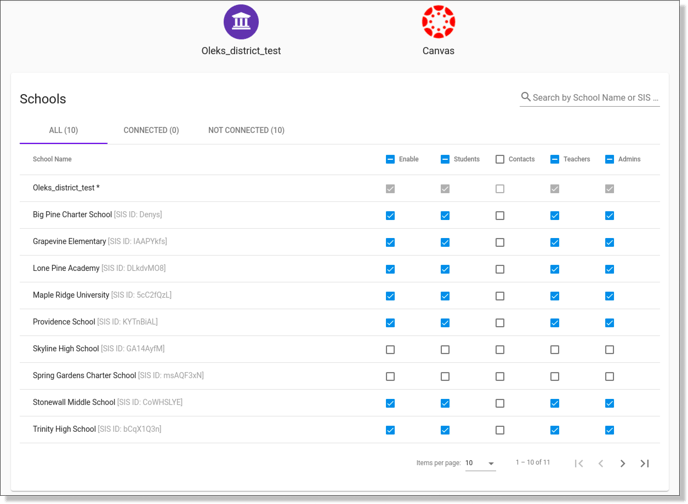
- The following screen will provide you with an option to share the activated application with particular schools and types of users:

- Once you have added the application and set up sharing rules, click the ACTIVATE button in the right-hand corner.
Note: Each SSO App requires the exchange of XML data and unique configurations in the SchoolDay and App you want to set up SSO with.
To continue configuration, please reach out to SchoolDay Customer Support with the request to provide corresponding instructions.