Coursera courses can be integrated into D2L using LTI 1.3 technology. Once a Coursera course(s) is enabled in the D2L environment, following the instructions in this article, users will be able to perform Single Sign-On (SSO) to Coursera course(s) right from the D2L learning management system (LMS) and learning results will be synced from Coursera to D2L.
Article content:
General Integration Overview Video
Grade Sync Options Overview Video
LTI Setup for Final Grade Sync Instructions
General Integration Overview Video
Grade Sync Options Overview Video
Note: for more info about grade sync options see the article Grades sync to LMS from Coursera.
LTI Setup for Final Grade Sync Instructions
Attention: If you are interested in GRANULAR GRADE SYNC (Option A or B), please follow the instructions from the given article.
If you would like to proceed with the FINAL GRADE SYNC option, please follow the instructions given below.
The integration setup steps are the following:
- Register tool at the D2L instance;
- Publish Coursera courses in your LMS;
- Access Coursera courses from D2L;
- Syncing learning results from Coursera to D2L;
The detailed instructions are given below.
Configuring Coursera Course as an LTI tool
Registering tool at the D2L instance
- Login to the D2L website as an Administrator.
- Navigate to Settings Cog > Manage Extensibility > LTI Advantage > Register Tool.
 Scroll down to find “Manage Extensibility” and click on it:
You should see the following window:
Click on the REGISTER TOOL button and choose the Standard option:
- Fill in the “Register a Tool” form with the data below and click REGISTER:
Name: Coursera
Domain: https://api.gg4l.com
Redirects URLs:
*paste: https://coursera.gg4l.com/auth/lti13/SSO
*click: +Add Redirect URL
*paste: https://api.gg4l.com/datahub/services/ims/lti/v1p3/deep_linkOpenId Connect Login URL: https://coursera.gg4l.com/lti/tools/login_initiations
Target Link URL: leave blank
Keyset URL: https://coursera.gg4l.com/ims/lti/.well-known/jwks.jsonExtensions: *option enables after Keyset URL is entered
- Assignment and Grade Services
- Deep Linking
- Names and Role Provisioning Services
Send Institution Role: Yes

- Click the REGISTER button.

- After that you will see the window with Brightspace Registration Details:

Note: Please copy and save all the details. You will later need to provide it to the SchoolDayCustomer Support Agent.
Deployment Registration
- Click on the View Deployments link in the pop-up message.

- You will be redirected to the following page. Click on the NEW DEPLOYMENT button:

- Start filling in the necessary fields with the following information:
Mark “Enable”;
Tool: select the previously created tool;
Name: Coursera;
Enable Extensions:
- Deep Linking
- Assignment and Grades Services
- Names and Role Provisioning Services
Enable Security Settings:
- Org Unit Information
- User Information
- Link Information
Enable “Open as External Resource”
Make tool available to: Add Org Units -> *pick all course shells that will use Coursera content*


- Click CREATE DEPLOYMENT:

- Please copy this “Deployment id’ value and paste it into the information needed to share with SchoolDay Customer Support.

Note: Once the tool is successfully deployed, please share the following information with SchoolDay Customer Support:
Authentication request URL (OpenID Connect Authentication Endpoint)
Public keyset URL (Brightspace Keyset URL)
Access token URL (Brightspace OAuth2 Access Token URL)
Client ID
Issuer
Deployment ID
After you receive a confirmation from the SchoolDay Support side that everything is received and set up, please proceed with the next instructions.
Registering a new LTI Advantage Link
Once you successfully create a tool, you need to create the LTI link.
- Click on the View Links to register a new LTI Advantage Link.

- You will be redirected to the following page. Click on the NEW LINK button:

- Fill in the Create Link form and click SAVE AND CLOSE.
Mark “Enable”;
Name: Coursera;
URL: https://api.gg4l.com/datahub/services/ims/lti/v1p3/deep_link
Description: whatever you prefer (*optional)
Type: Deep link Quicklink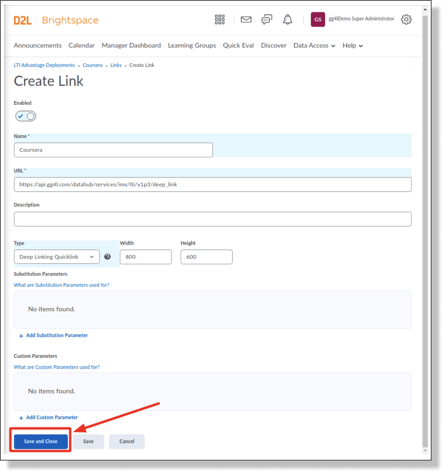
Publishing Coursera courses in your LMS
This section describes publishing Coursera Course(s) into D2L course(s).
- Choose the needed course shell. For this, go to the Content tab and enter the name of the module in the "Add a module" field. Then hit ENTER.

- Click on the EXISTING ACTIVITIES button and add “Activity” to the module. Choose the “Coursera” deployment option that was created before.


- Pick your organization/campus.

- In the modal window choose the respective course (scroll down or use the search bar on the top of this window and pick the Coursera course). Then hit the SUBMIT button.

- After the content was successfully added, click on the drop-down arrow next to the content and select EDIT PROPERTIES IN-PLACE:

- Enable the checkbox “Open as External Resource”. That’s required for further SSO.

-
Click on the created content name and get redirected to Coursera.

-
Repeat the steps to add the rest of the available Coursera courses.
Accessing Coursera Course from Desire2Learn
To access the Coursera course an LMS learner would navigate to a “Content" section of the LMS course and click on the hyperlink that is associated with the corresponding Coursera course (to launch SSO click on the OPEN IN NEW WINDOW button).
Once the user is redirected to Coursera for the first time, the user is prompted to complete enrollment: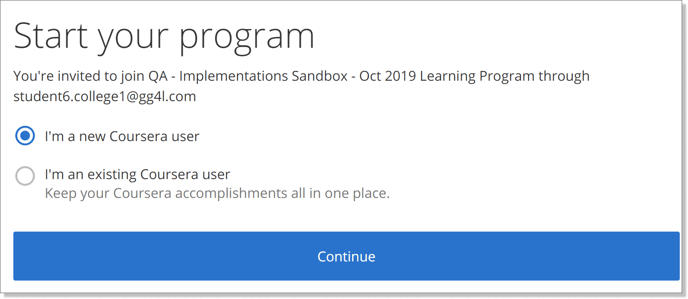
There are 2 scenarios at this stage:
1. The user already has a Coursera account: the system will ask the user to provide an email address and a password for the existing account: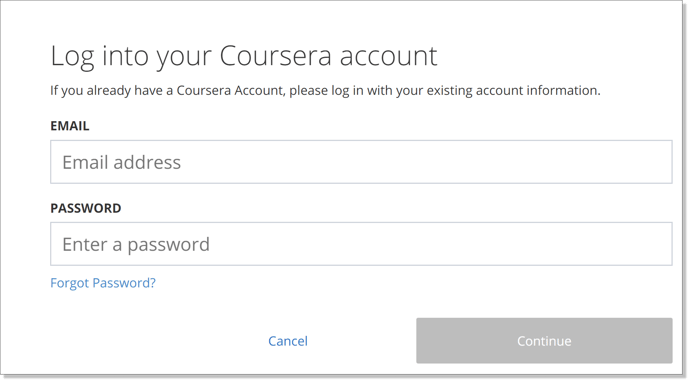
2. The user is new to Coursera: the system will prompt the user to create a password: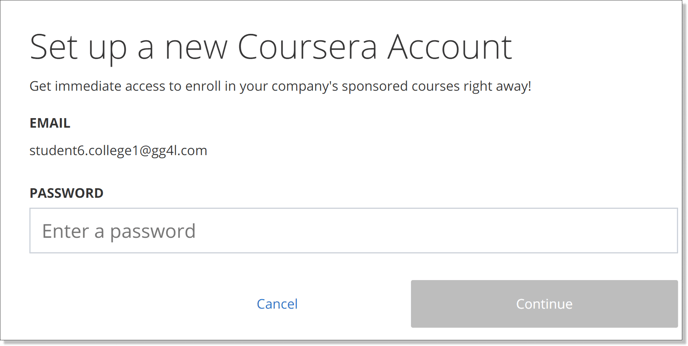

Note: here is a link to the article on how to access Coursera that you can share with your students.
Please note: some browsers have pop-up blockers set by default which prevent users from showing the page. Please make sure the blocker is turned off before you access the course.
Syncing learning results from Coursera to D2L
To examine the learning results from Coursera for learners, who are enrolled in the D2L course, the LMS Instructor needs to use the Grades tab of the respective LMS course.

Grades are transformed from a scale of 0...1 in Coursera to 0...100 in D2L.
Grades are shown in D2L when a learner completes the respective course in Coursera.