Google Classroom is a powerful and easy-to-use learning management system (LMS) that works with many other third-party apps and services to make digital education easier, more affordable, and accessible for teachers, students, guardians, and admins alike.
This article describes how to set up integration between Qwiklabs and Google Classroom in SchoolDay Connect. Please follow the order of the article when configuring the integration.
The integration steps are the following:
- Configure Qwiklabs;
- Configure SchoolDay
- Sync Qwiklabs courses in Google Classroom;
- Grade Sync from Qwiklabs to Google Classroom.
The detailed instructions are given below.
Integration Overview Video
Google Classroom Configuration
To configure the Google Classroom app, please follow the instructions below.
- Log in to your SchoolDay account. Check the instruction here.
- Navigate to the Connect module.

- Select Application Gallery from the left-side menu list.

- Find the Google Classroom application and click on the ACTIVATE button to start configuring the GC.


Note: Please use the appropriate Google account that has access to the class shells/courses which are going to participate in the Google IT Certificate program. Choose your account where you have access to your Google Classroom account as a teacher.
- Set up Delivery Config. In order to do this, you should grant Authorization Access. This means you are giving access to your Google Classroom data. For this, click the AUTHORIZE ACCESS button.

- Check all the available checkboxes and click on the CONTINUE button.

- The next step is Schools Mapping. Select schools (class shells) that will use integration with Qwiklabs. Click on the SchoolDay School field next to the Google Classroom class to choose the school name that this class belongs to.

- The next step is SSO Applications. In this step, you can already FINISH CONFIGURATION or continue to configure further settings.

Qwiklabs Configuration
When the GC app is configured, navigate to the Home tab, and follow the instructions below.
- Paste in the search bar of your browser the following link and hit enter on your keyboard: https://connect.gg4l.com/admin/applications/add/qwiklabs

- You will get to the following screen.
Change the Service URL to https://career.certificate.google
Click on the arrow icon at the bottom of the page.
- Click on the toggle button next to the Create new Qwiklabs School to activate the GC class.
Note: Once the class is activated, you will not be able to deactivate it.

- On the Qwiklabs Courses step, in the Enter Course title field, choose the first option “Google IT Support Professional Certificate” to add all 5 individual modules included in the course and click on the arrow icon at the bottom of the page.

- You will get to the following screen. Click on the pencil icon to edit and create sessions.

- Click on the Enter Class Name field, and the dropdown list with Google Classroom’s shells should appear. Pick and click on the appropriate one, you can also adjust the field “Qwiklabs class name” by adding the name of the teacher. Also, add the approximate end date of the course and then click the DONE button.


- The popup window will appear. Click GENERATE to auto-generate the same name and dates for all 5 Qwiklabs classes (modules). Check the information and click DONE.


- The setting would be applied to all 5 classes. In this step, you can already FINISH CONFIGURATION by clicking the corresponding button.

SchoolDay Configuration
When the GC app and Qwiklabs app are configured, you can activate the SchoolDay app too. For this, follow the instructions below.
- Click on the Application Gallery:

- Locate the SchoolDay app and click the ACTIVATE button.


Sync Process
To start using the integrated Qwiklabs courses in Google Classroom, you should sync the data first. To do this, return to the Home section where you will see all three apps activated, and follow the instructions below.
- Click on the Qwiklabs app and hit the RUN IMPORT button.


- After the sync is finished, return to Home again. Choose the Google Classroom app, and click RUN SYNC to publish the links to Qwiklabs into the needed Google Classroom class shells.


- After the sync is finished please go to https://classroom.google.com/ and click on the needed class shell for Qwiklabs classes.

- Check if the links were successfully published as the assignments in the appropriate class shell and go to one of the assignments.

- Click on the Instructions tab and then on the link in it:

- You should see the following message of SSO Request first and the loaded Qwiklabs class page eventually.


Grade Sync from Qwiklabs to Google Classroom
SchoolDay offers 2 options for Google Classroom Integration:
- The course-level connection between Qwiklabs and Google Classroom (with no grade sync)
- The assignment-level connection between Qwiklabs and Google Classroom (with grade sync)
If the Assignment-Level integration is set up, once the student completes the Qwiklabs course gradable activity (quiz, lab, test, etc.), the grade is transferred to the Google Classroom grade book within 24 hours.
Instructor View: To check the grade, please do the following:
1. Go to the "Grades" tab and find the student, hover over their grade, and click on three dots sign (kebab menu icon), choose the "View submission" option: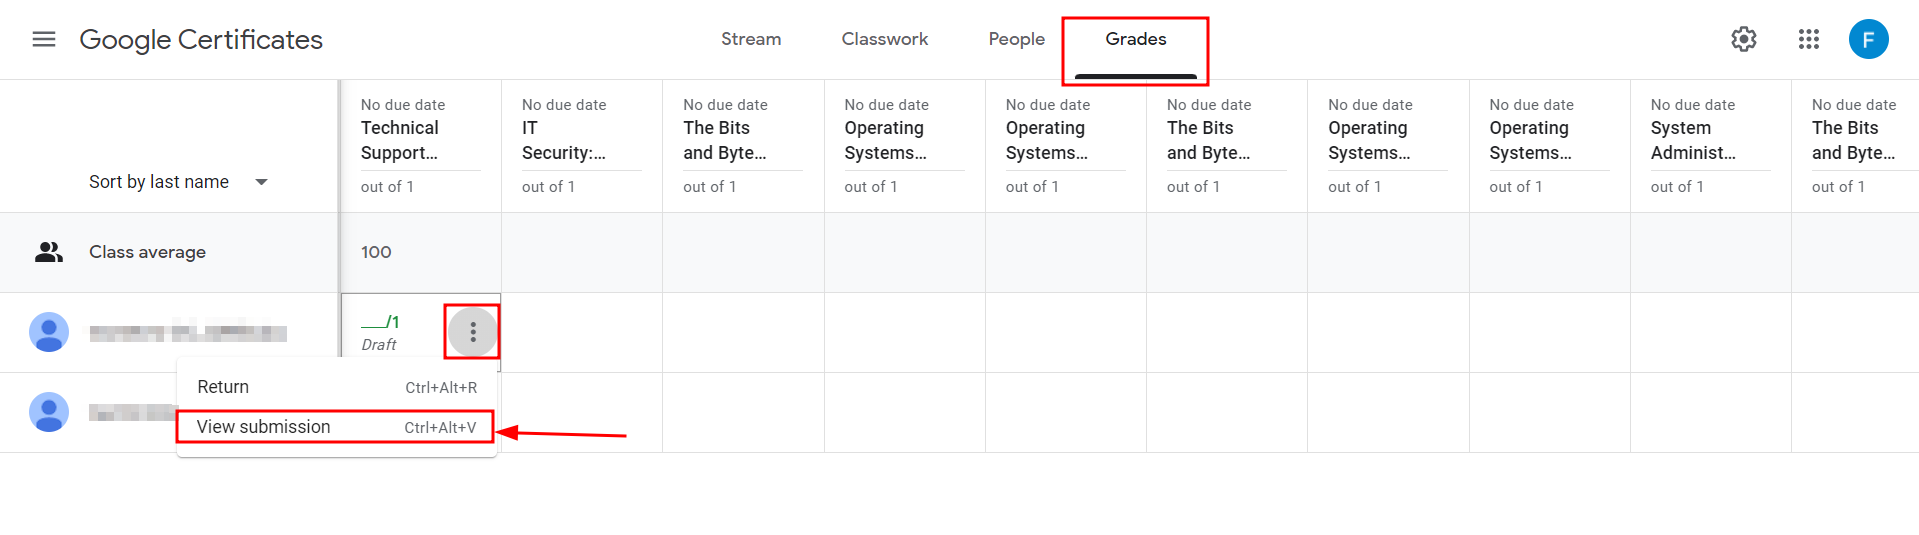
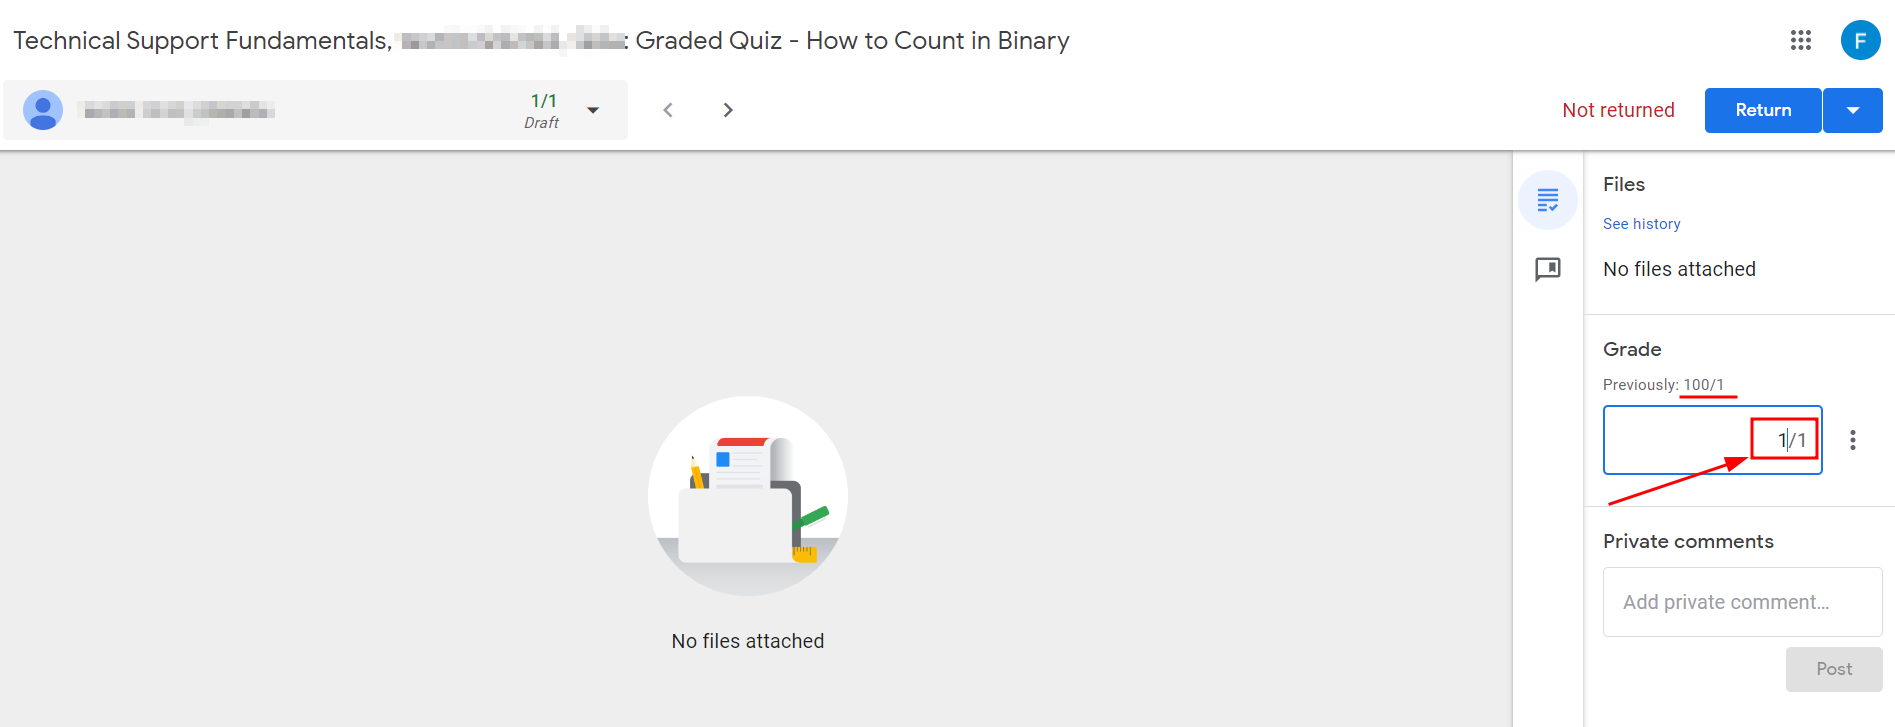
2. You will see the information on the student's grade opened in a new tab. There will be a "Grade" section and in the line Previously you will see the grade from Qwiklabs. Please note, the grade is reflected in percentages from 0 to 100%. You can set up any maximum score.

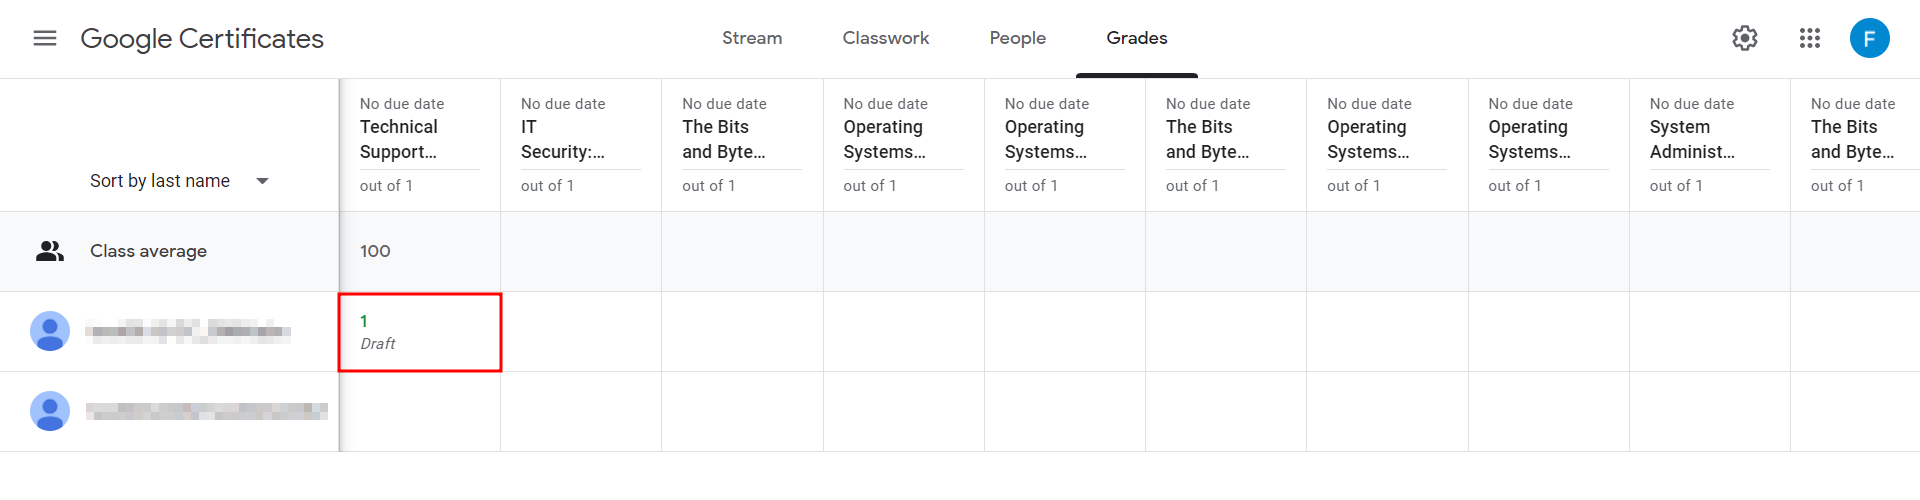
3. Please, type the grade in the field and it will be automatically saved and displayed in the Gradebook.
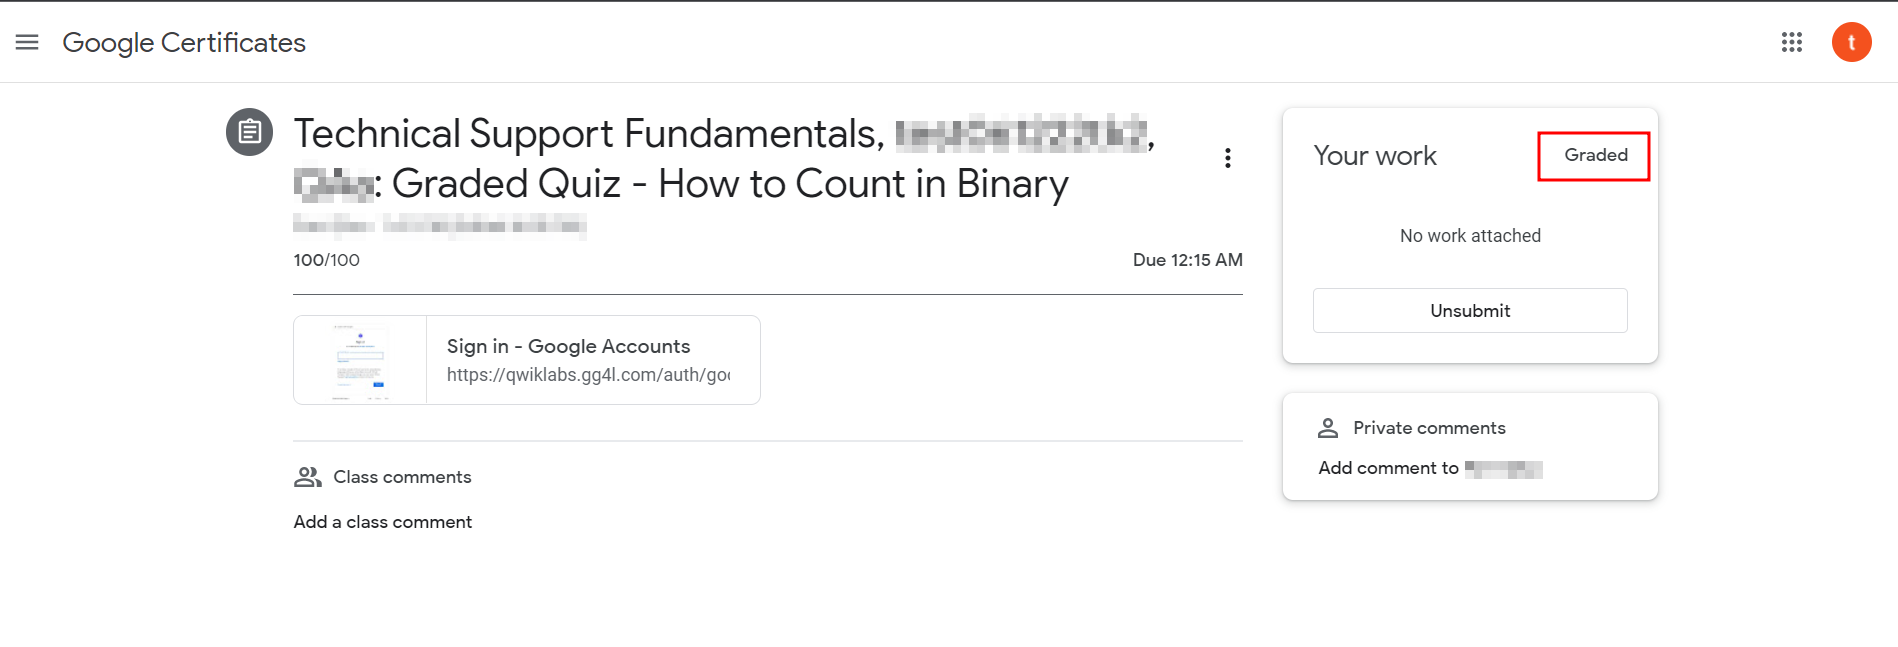
Student View: Once the grade is pushed to Google Classroom from SchoolDay, the assignment status changes to "Graded" and the student can see the grade by clicking "View assignment" as shown in the screenshot below: